Geo-Reference Zoning Master Plan
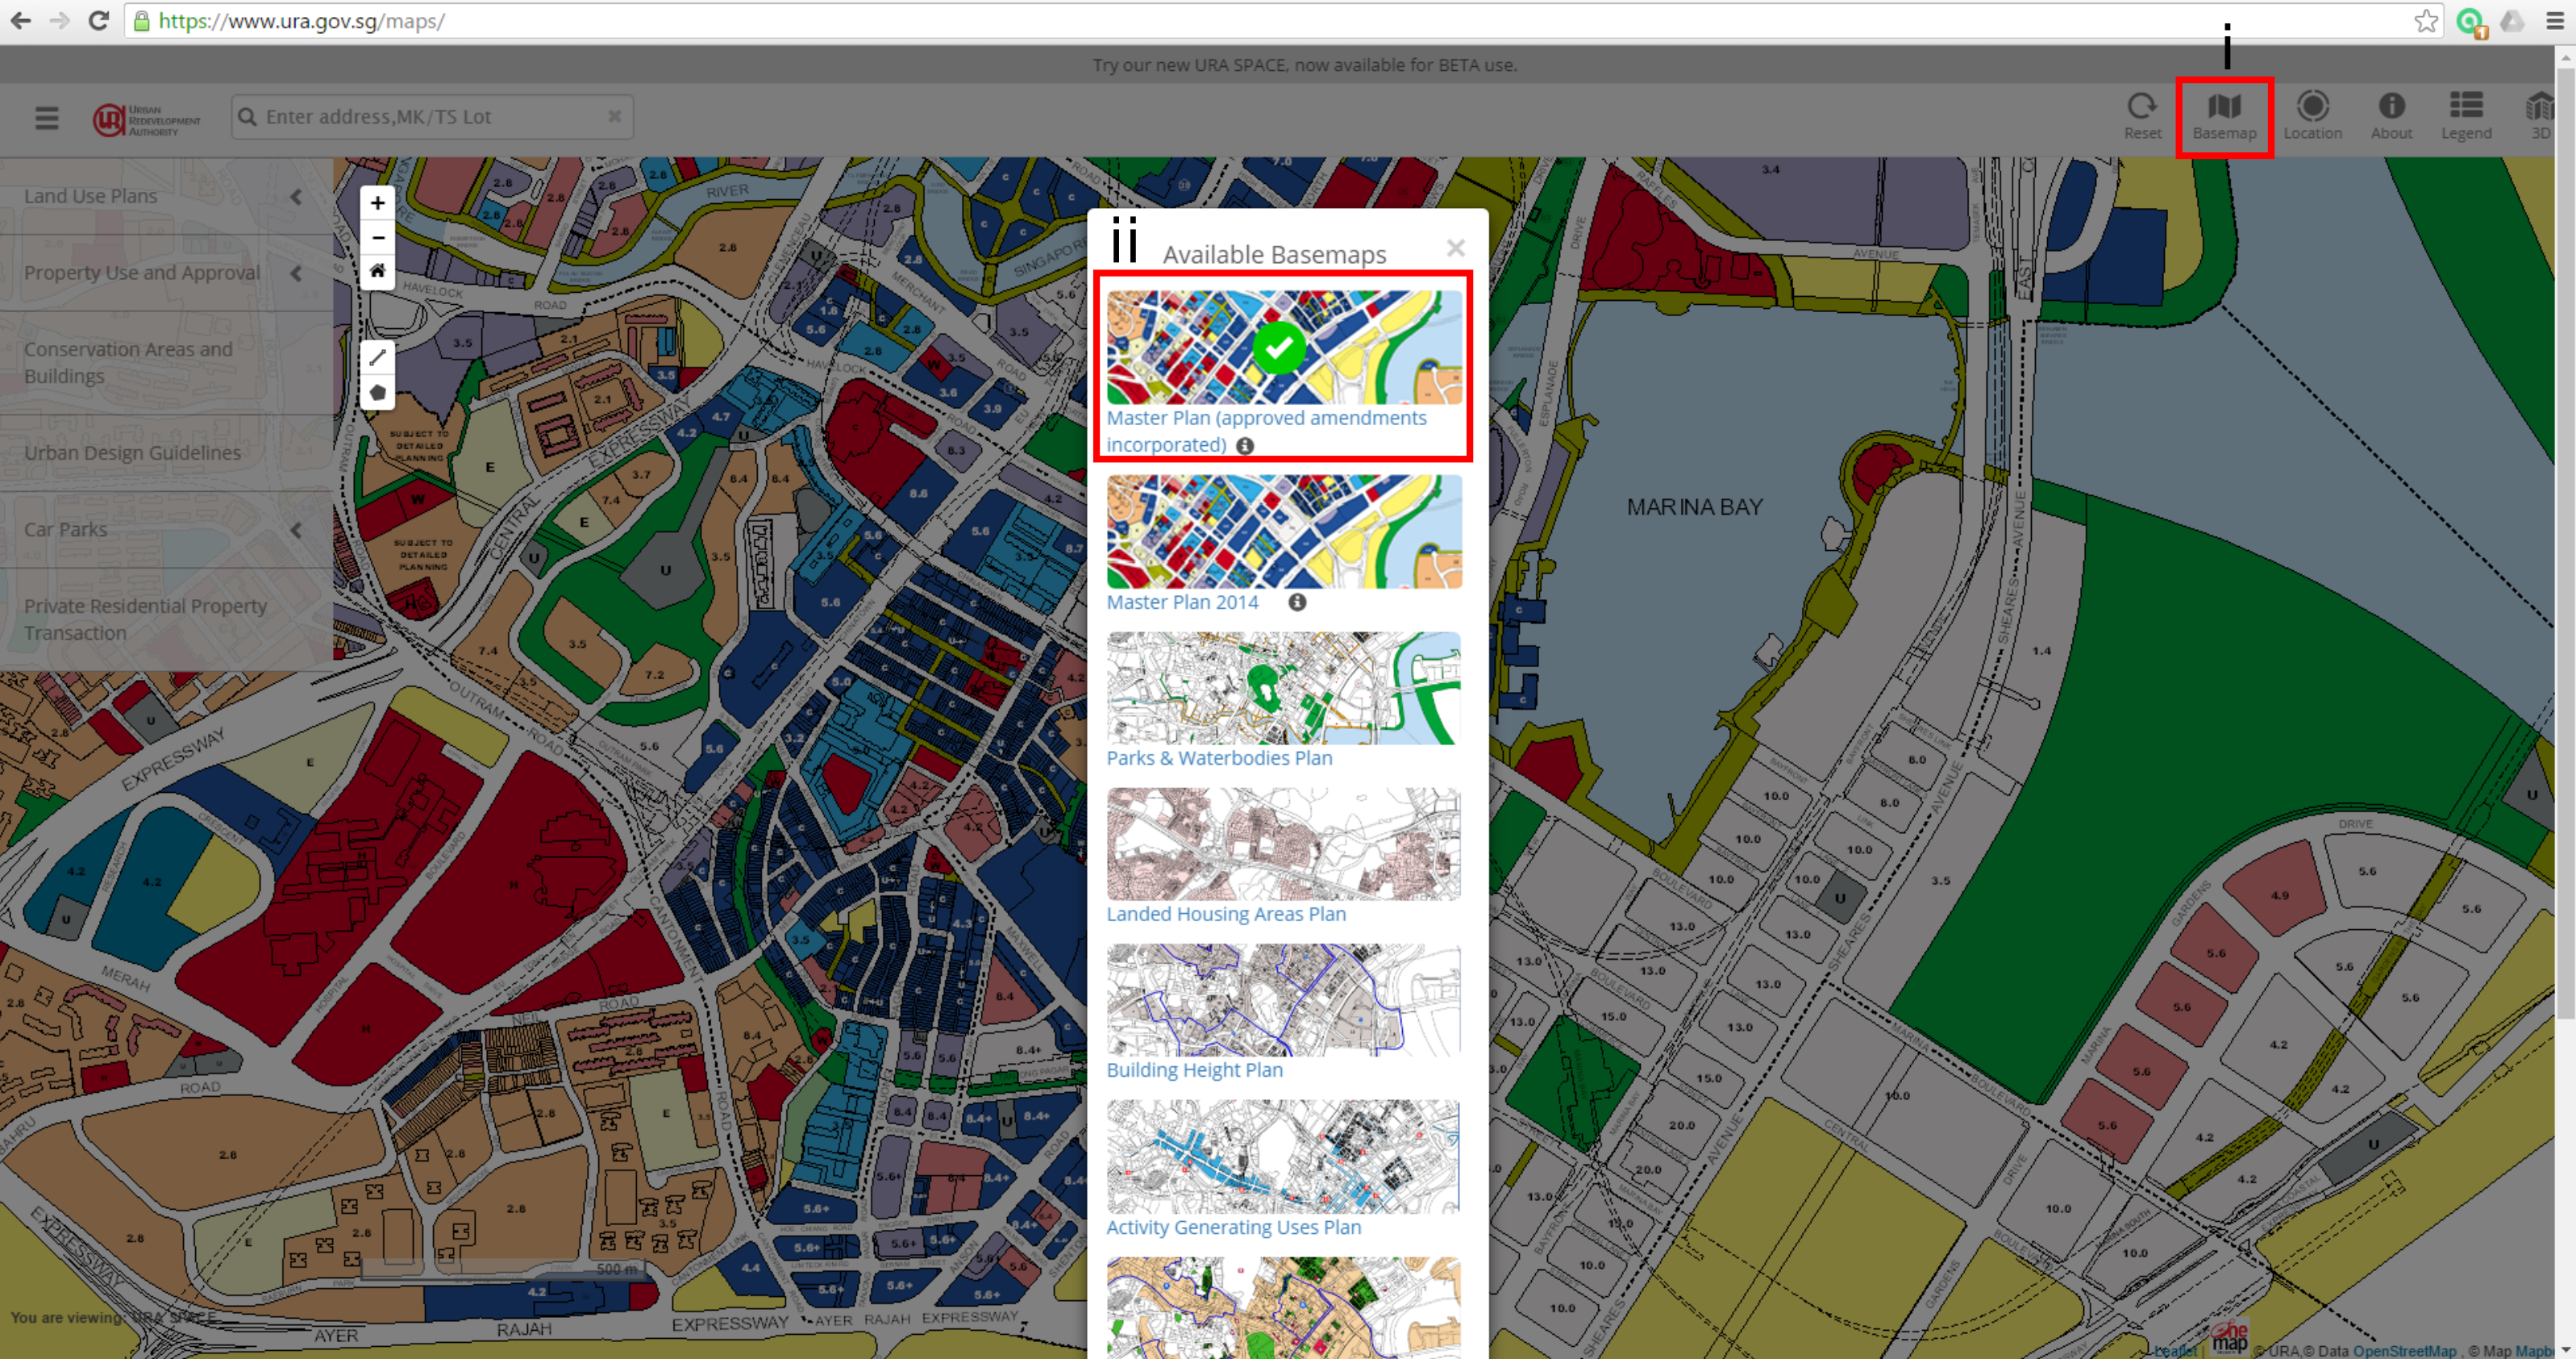
- 1.) Go to www.ura.gov.sg/maps/
- i.) Click on Basemap
- ii.) Choose the latest master plan.
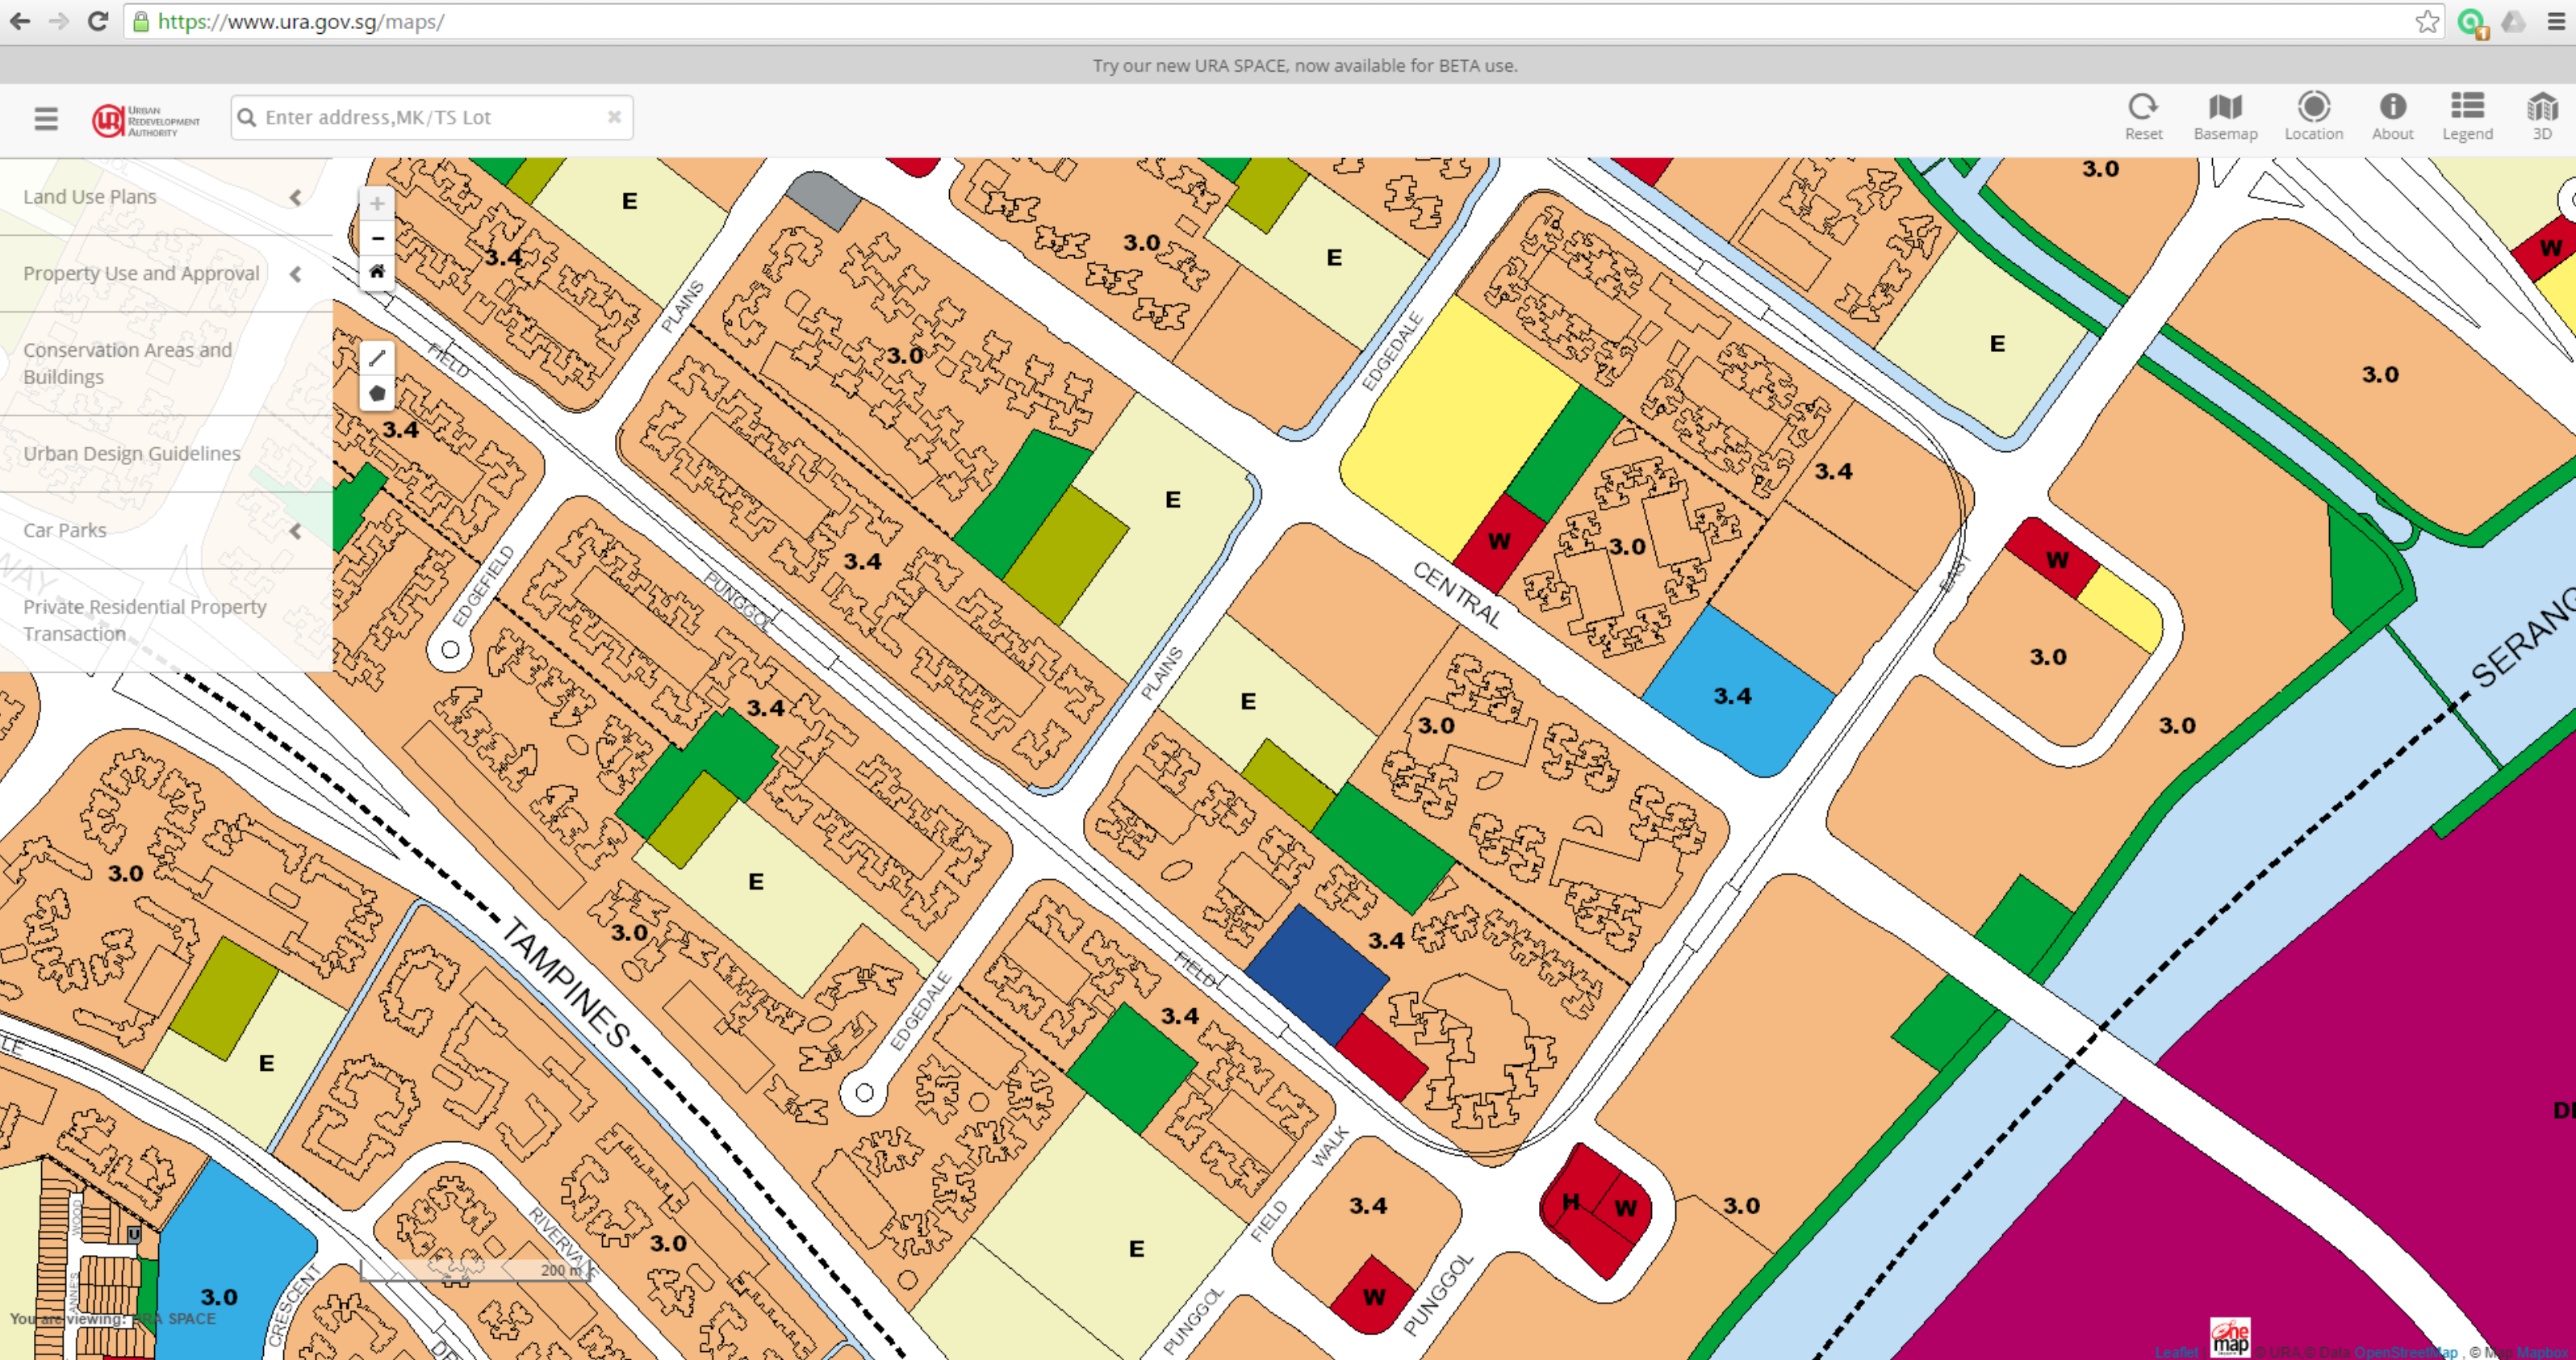
- 2.) Zoom into Punggol area and download the map. Screen capture the map and stitch the complete Punggol map using a image manipulation program. One can either use the open and free gimp (https://www.gimp.org/downloads/) or photoshop.
- 3.) Geo-reference the URA master plan map in QGIS.
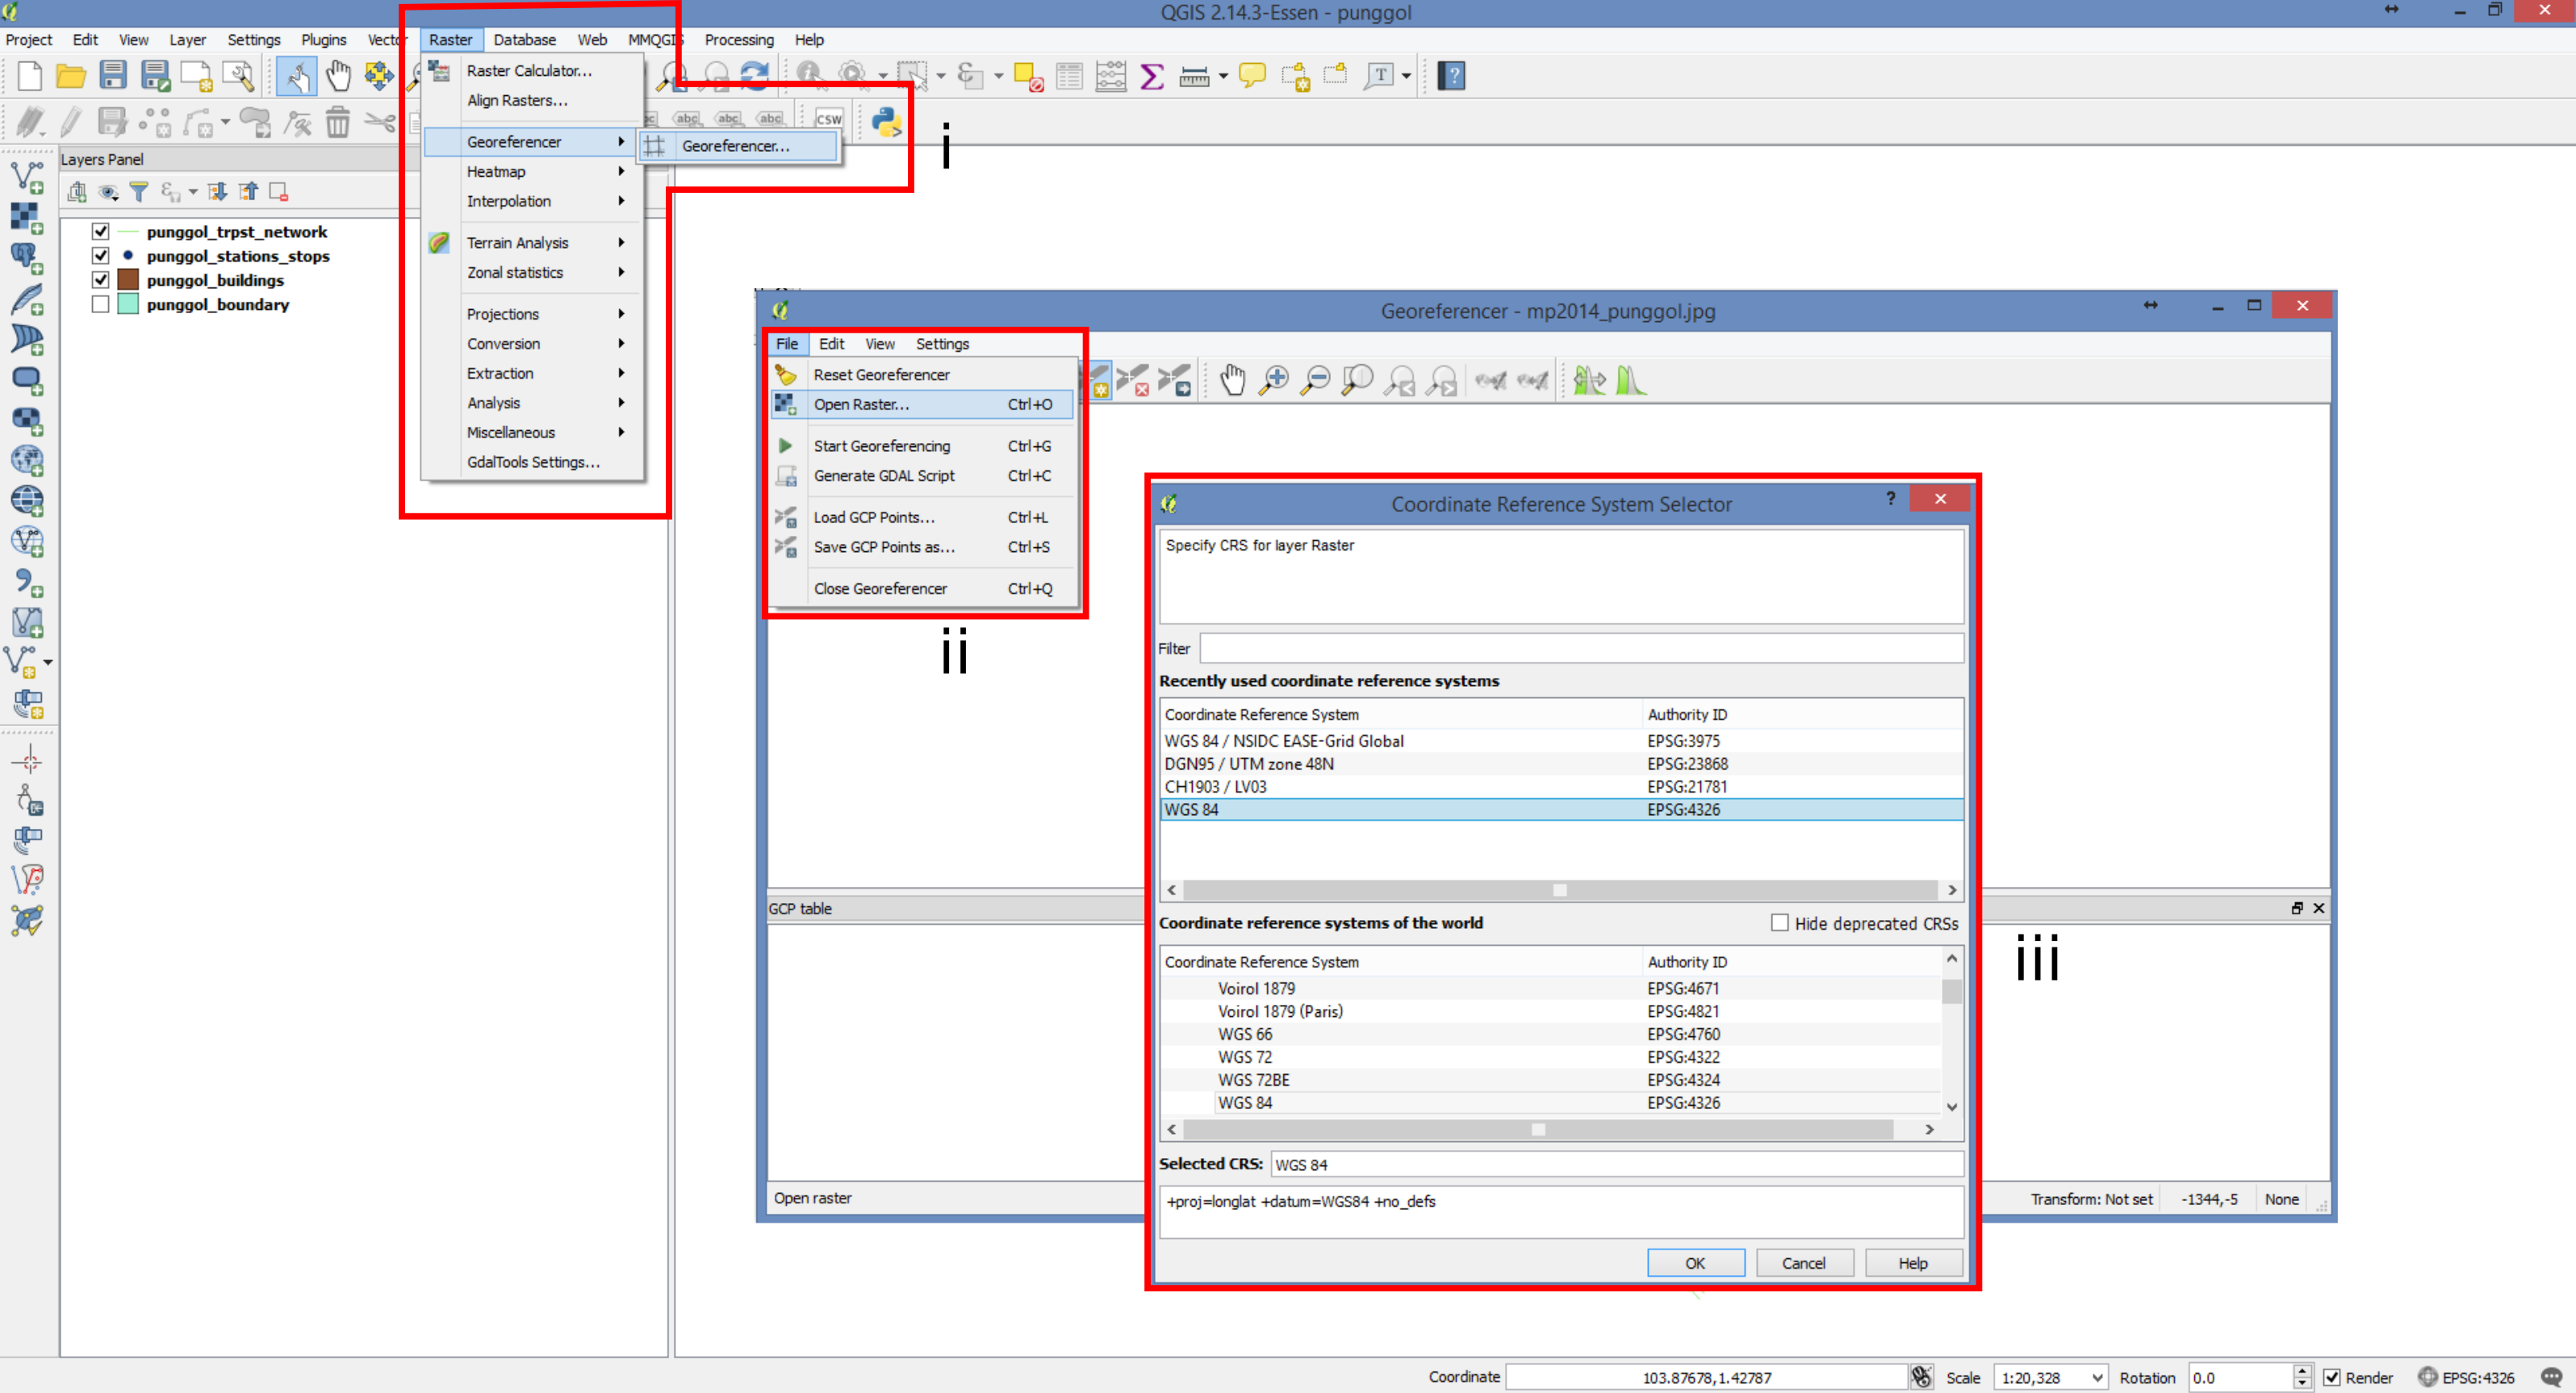
- i.) Go to Raster -> Georefrencer -> Georefrencer ...
- ii.) In the dialog box, go to File -> Open Raster ...
- iii.) In the Coordinate Reference System Selector dialog box, choose WGS 84 as the reference system.
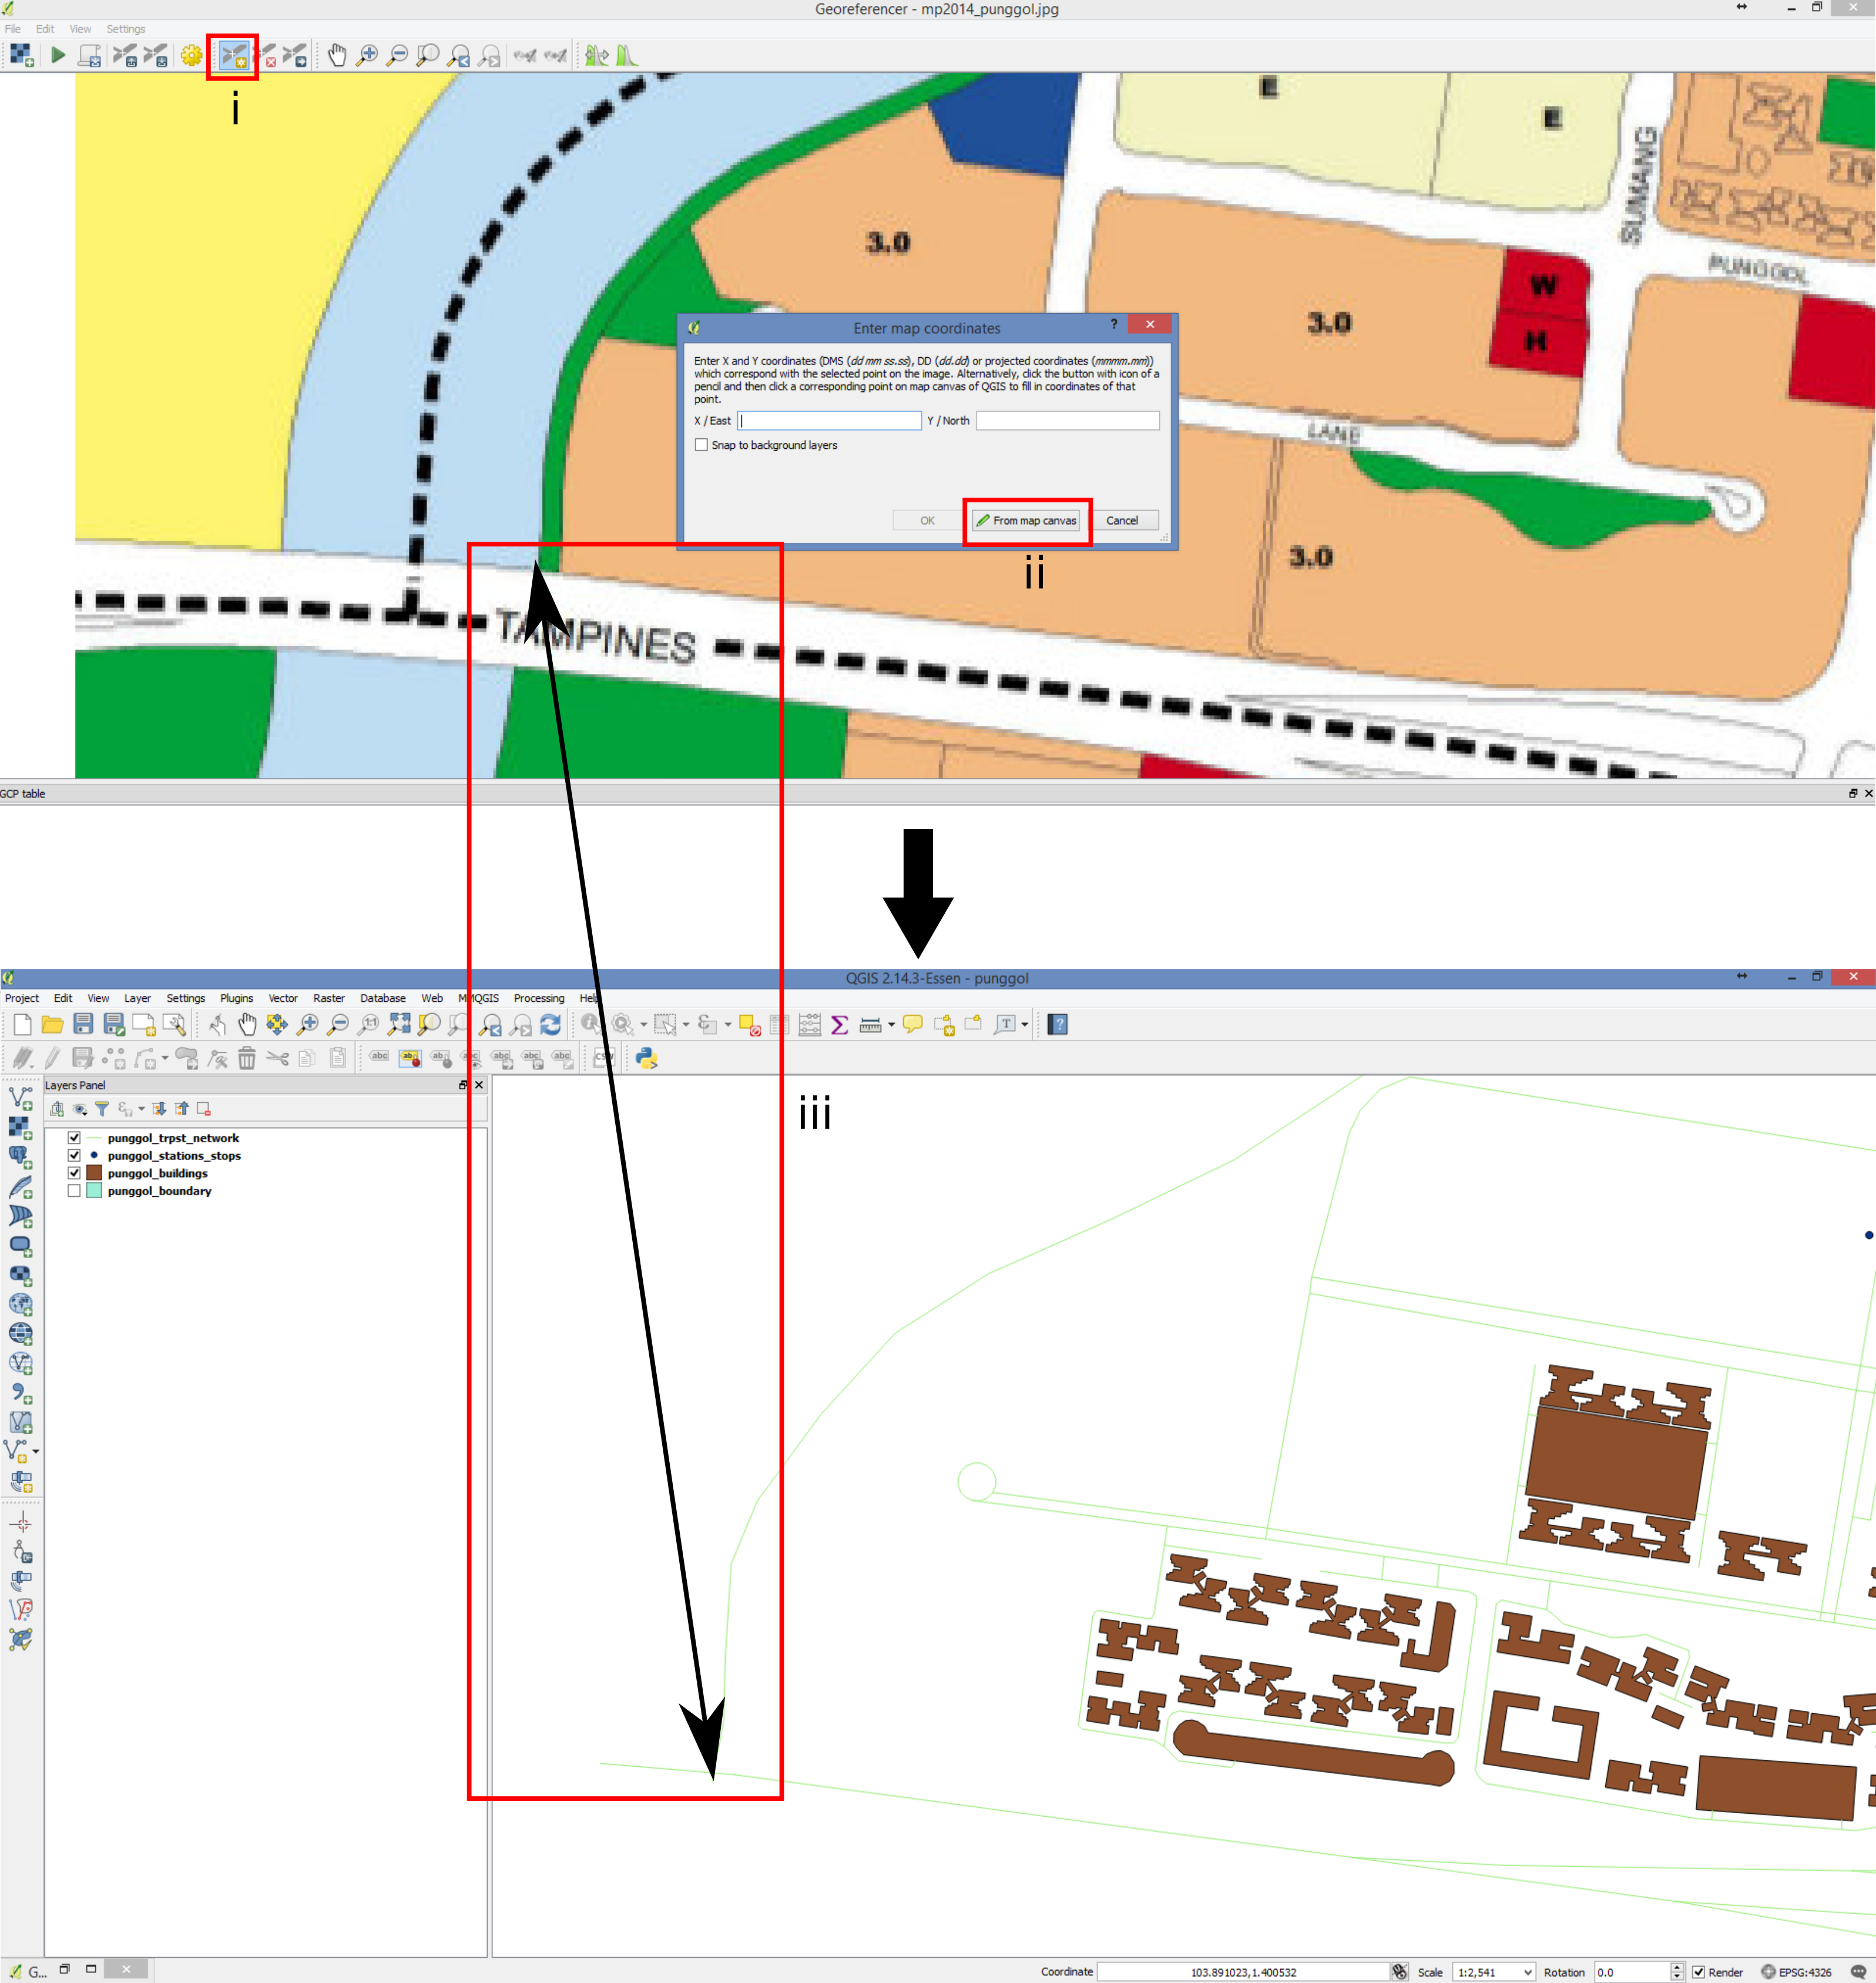
- 4.) Geo-reference the image by selecting corresponding points on the image and the vector layer.
- i.) Click on the "Add Point" icon.
- ii.) In the dialog box, click on the "From map canvas"
- iii.) Select the corresponding points on the raster image and on the layers.
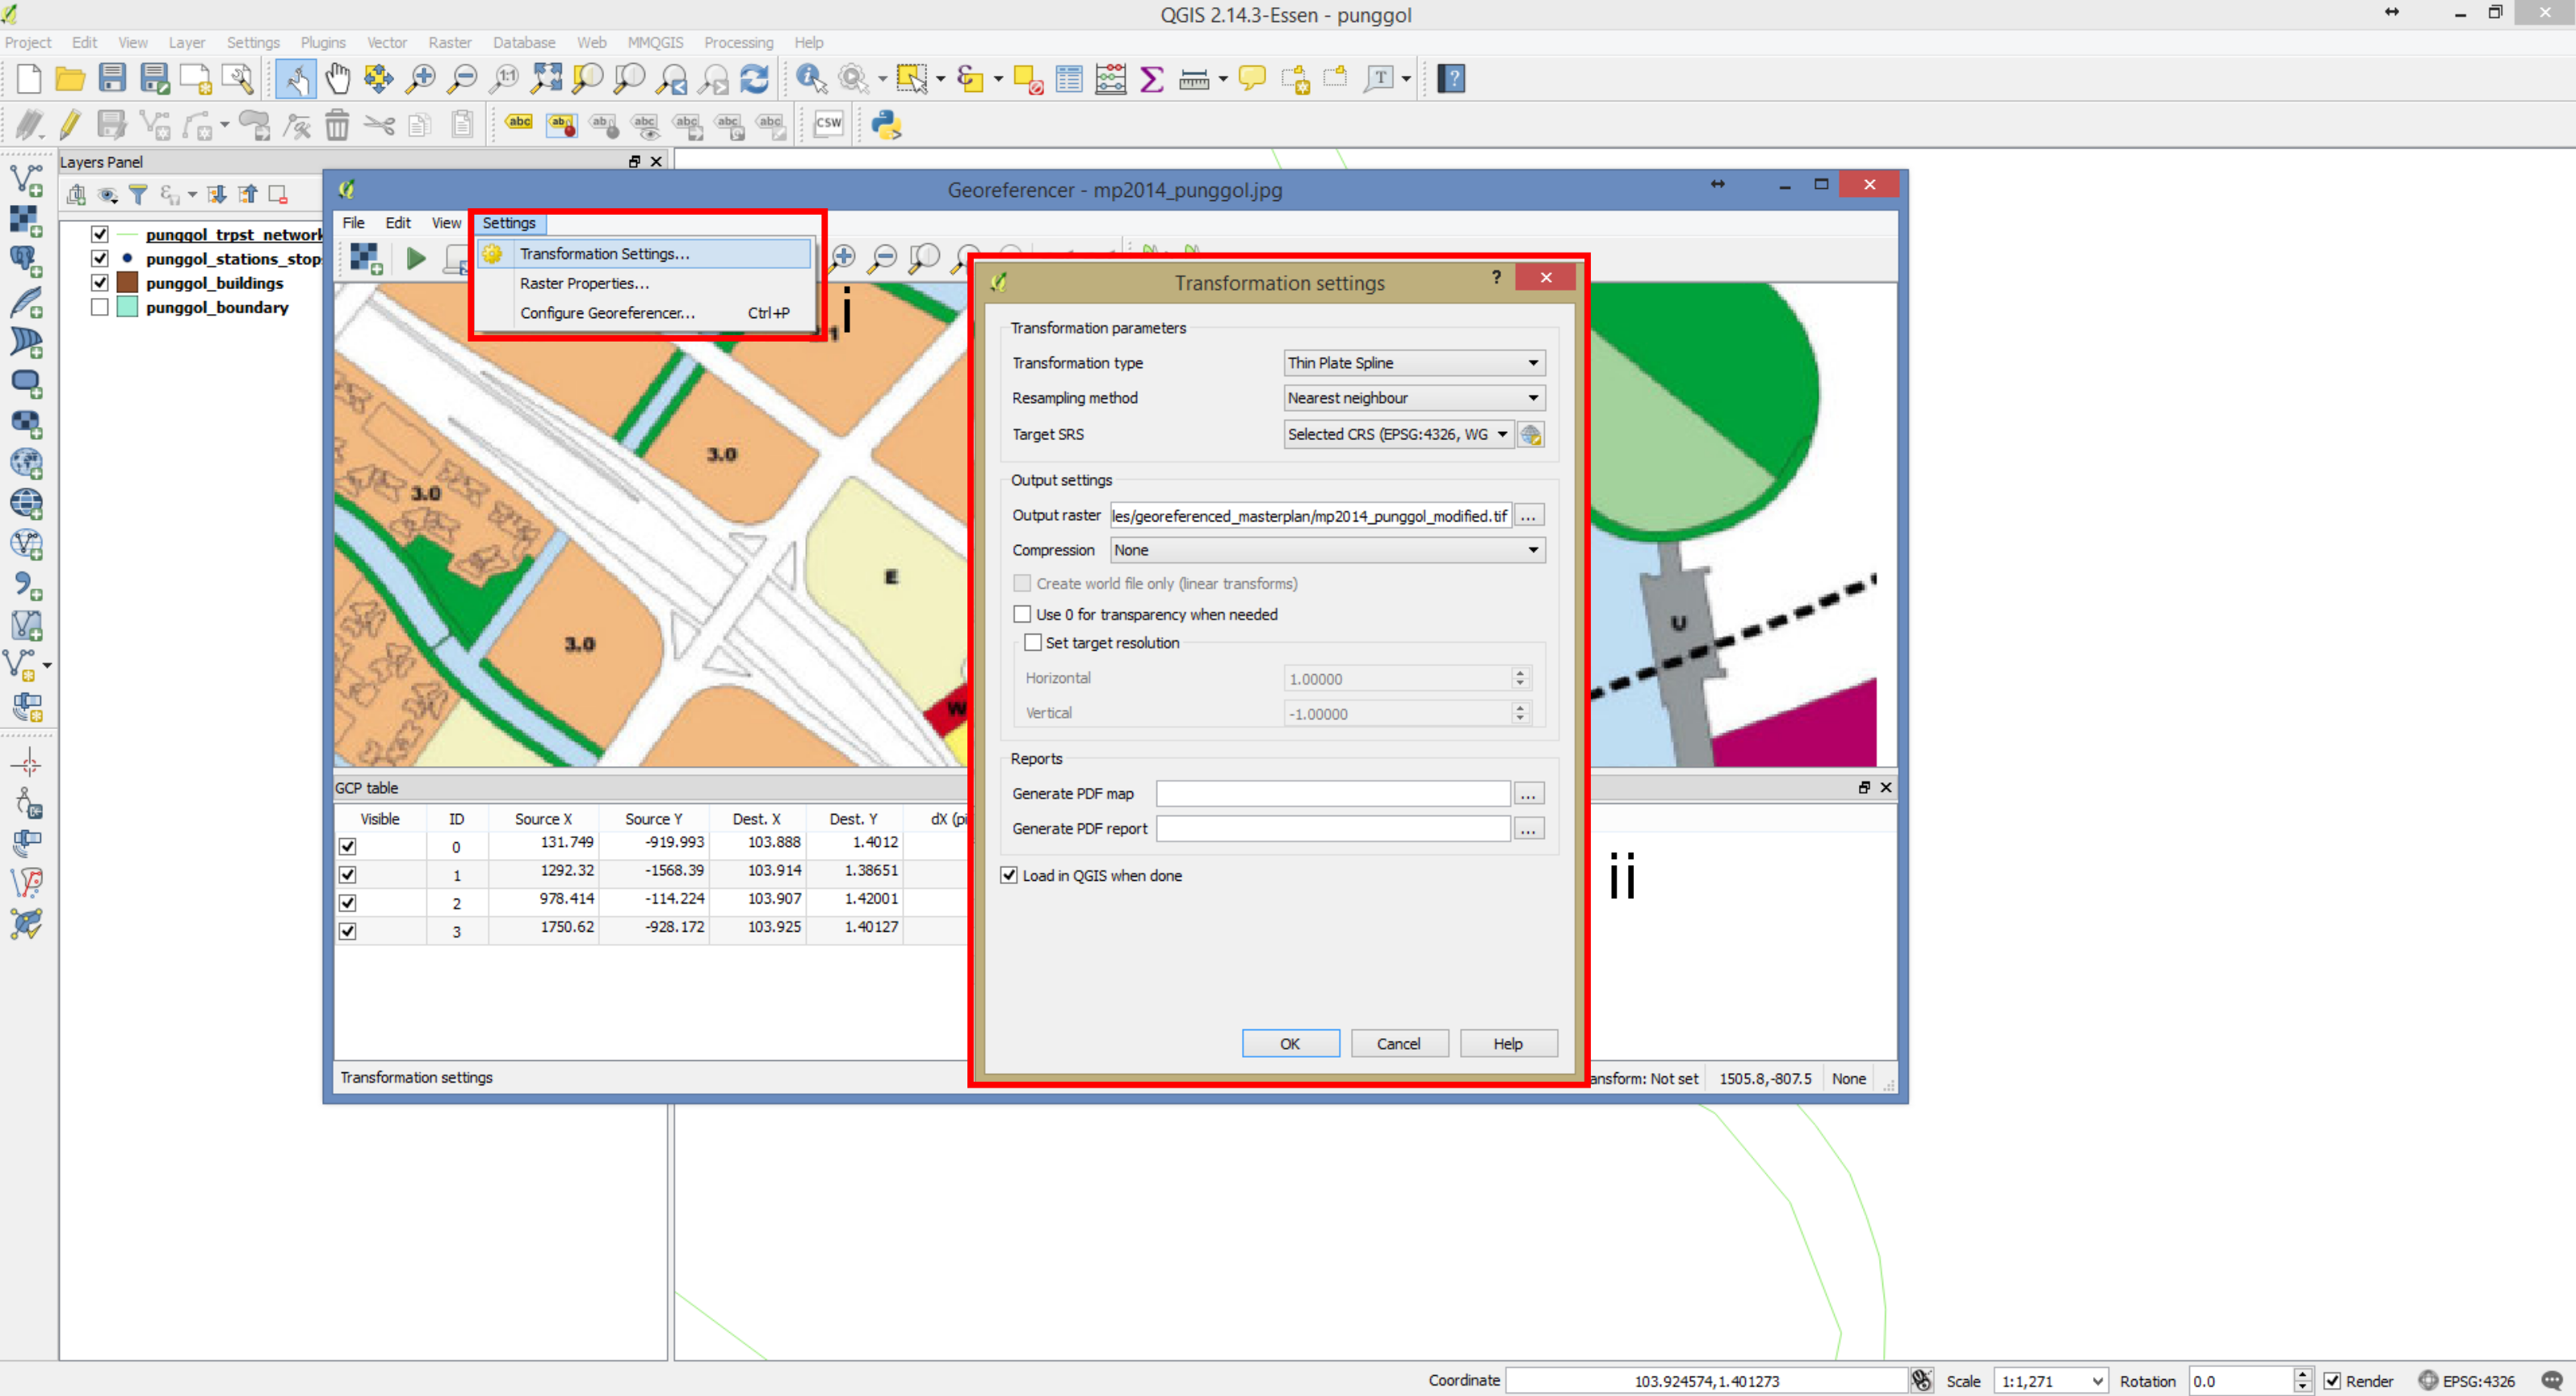
- 5.) The more corresponding points will lead to a better referenced image.
- i.) Go to Settings -> Transformation Settings ...
- ii.) In the dialog box, specify the output path for the geo-referenced image.
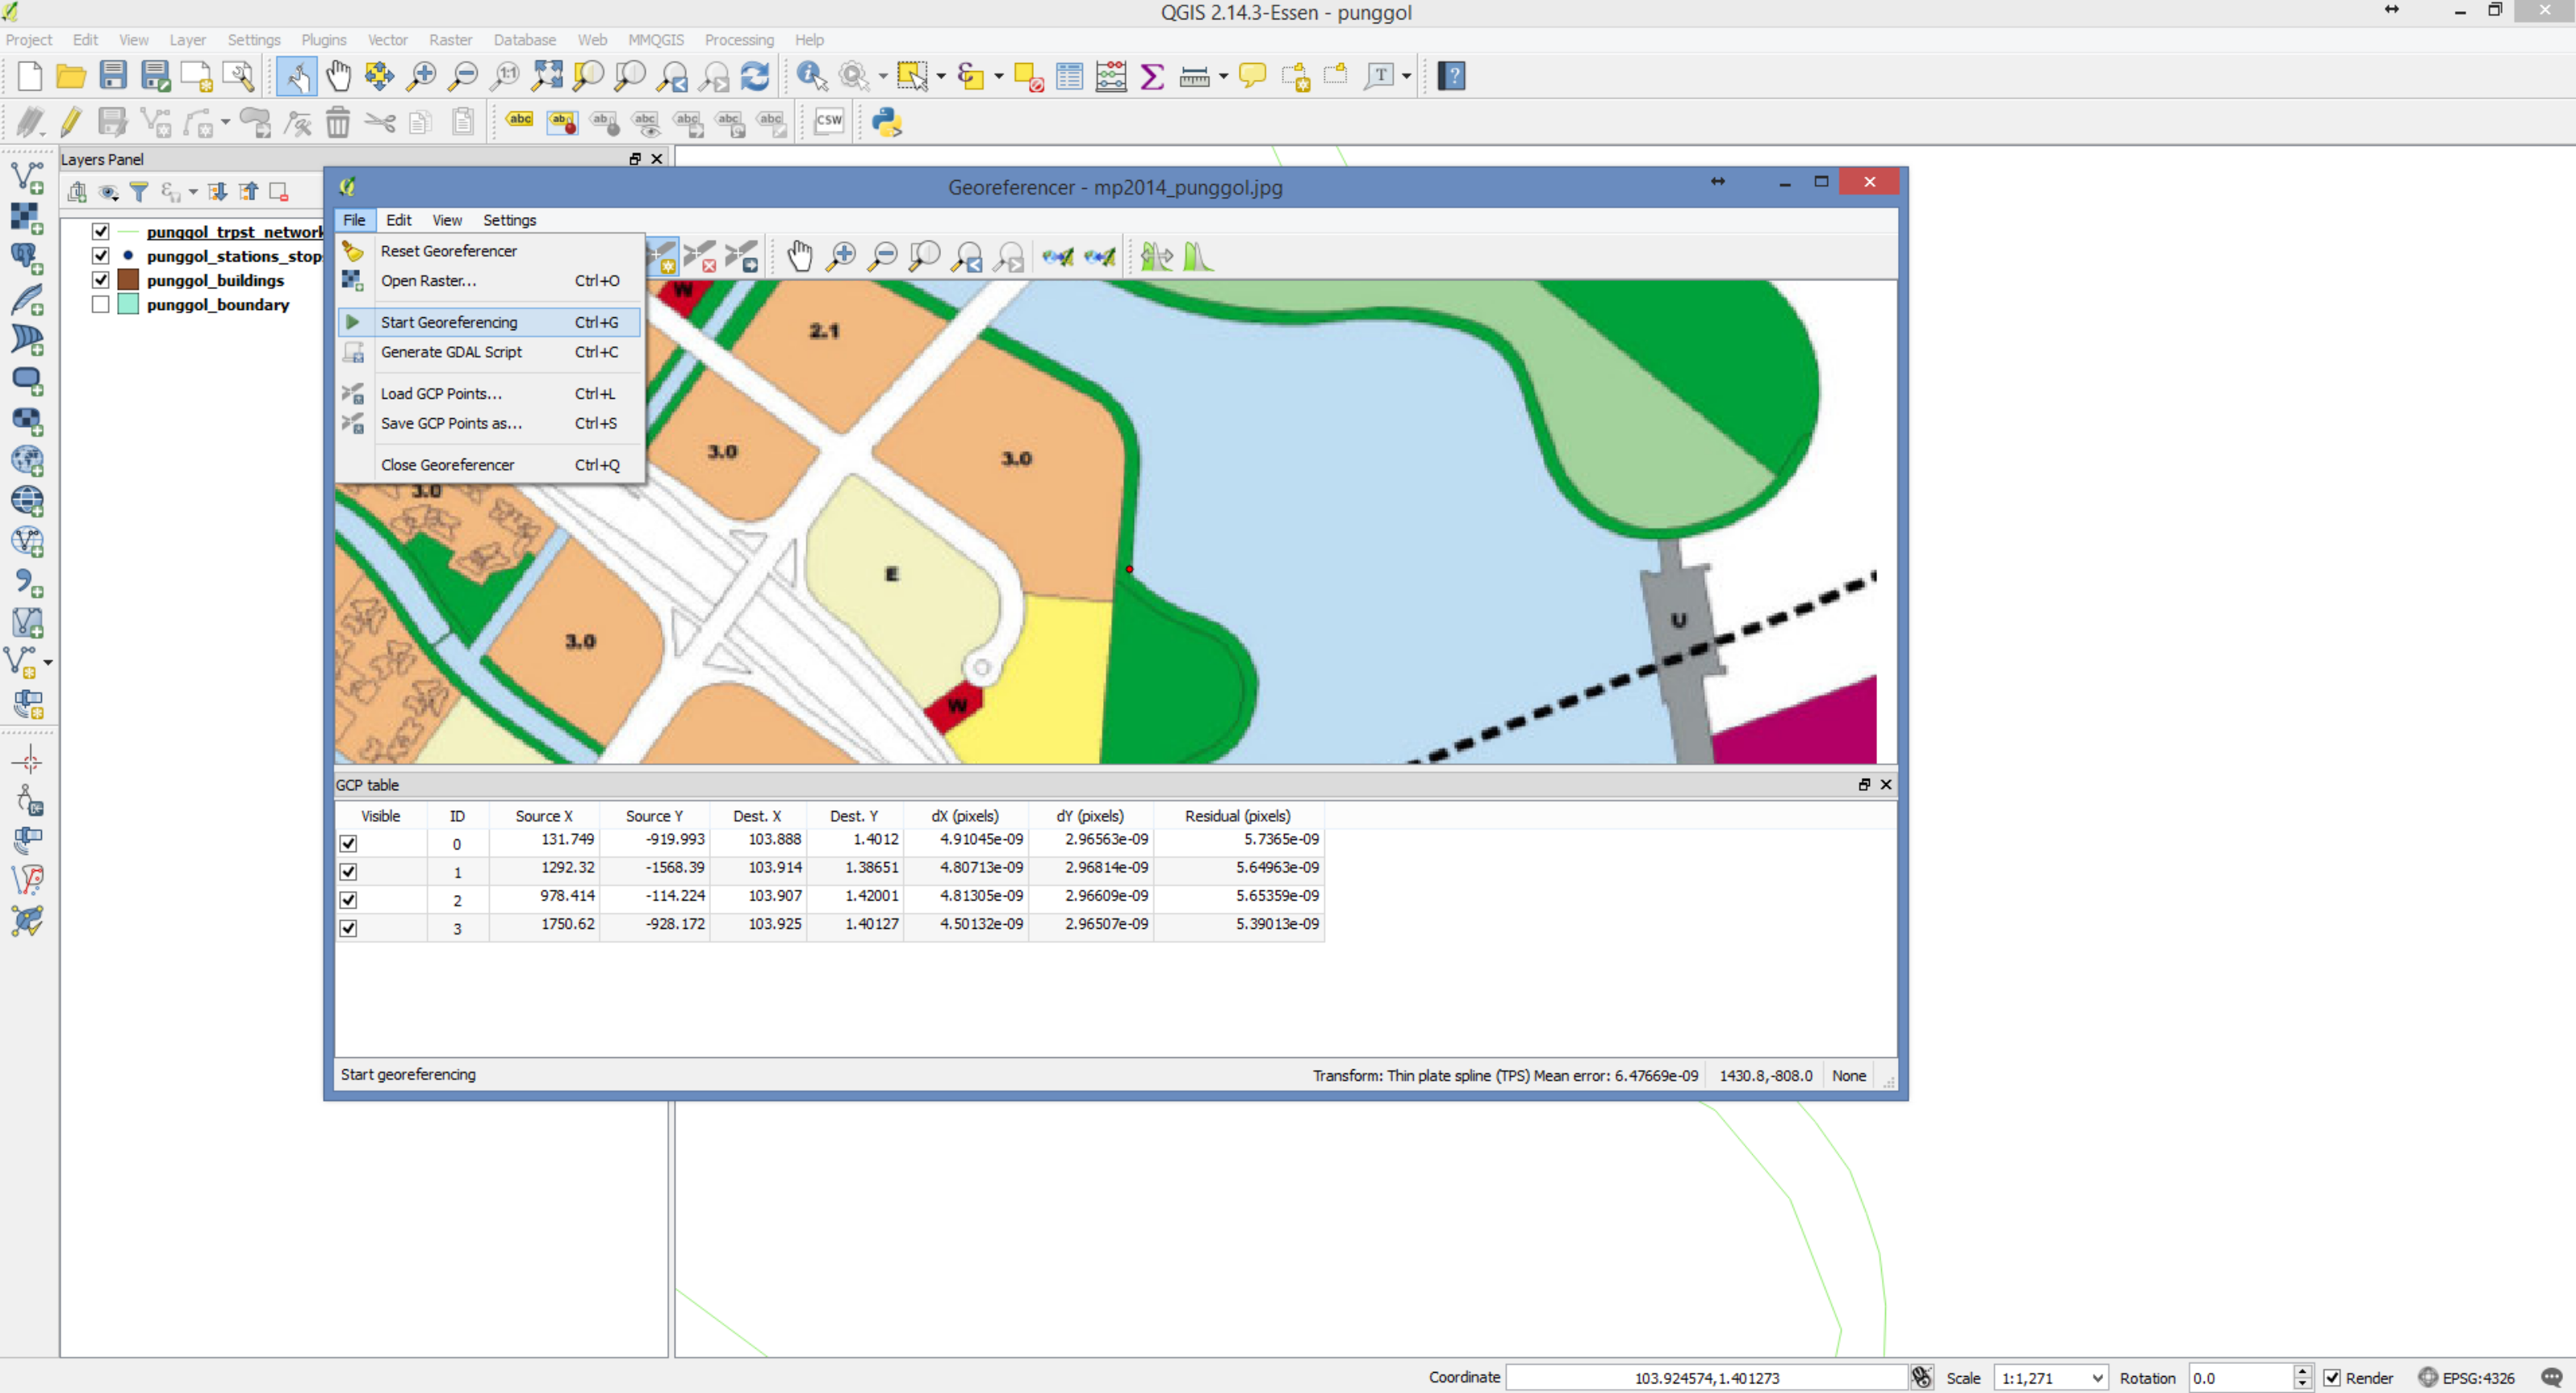
- 6.) Go to File -> Start Georeferencing
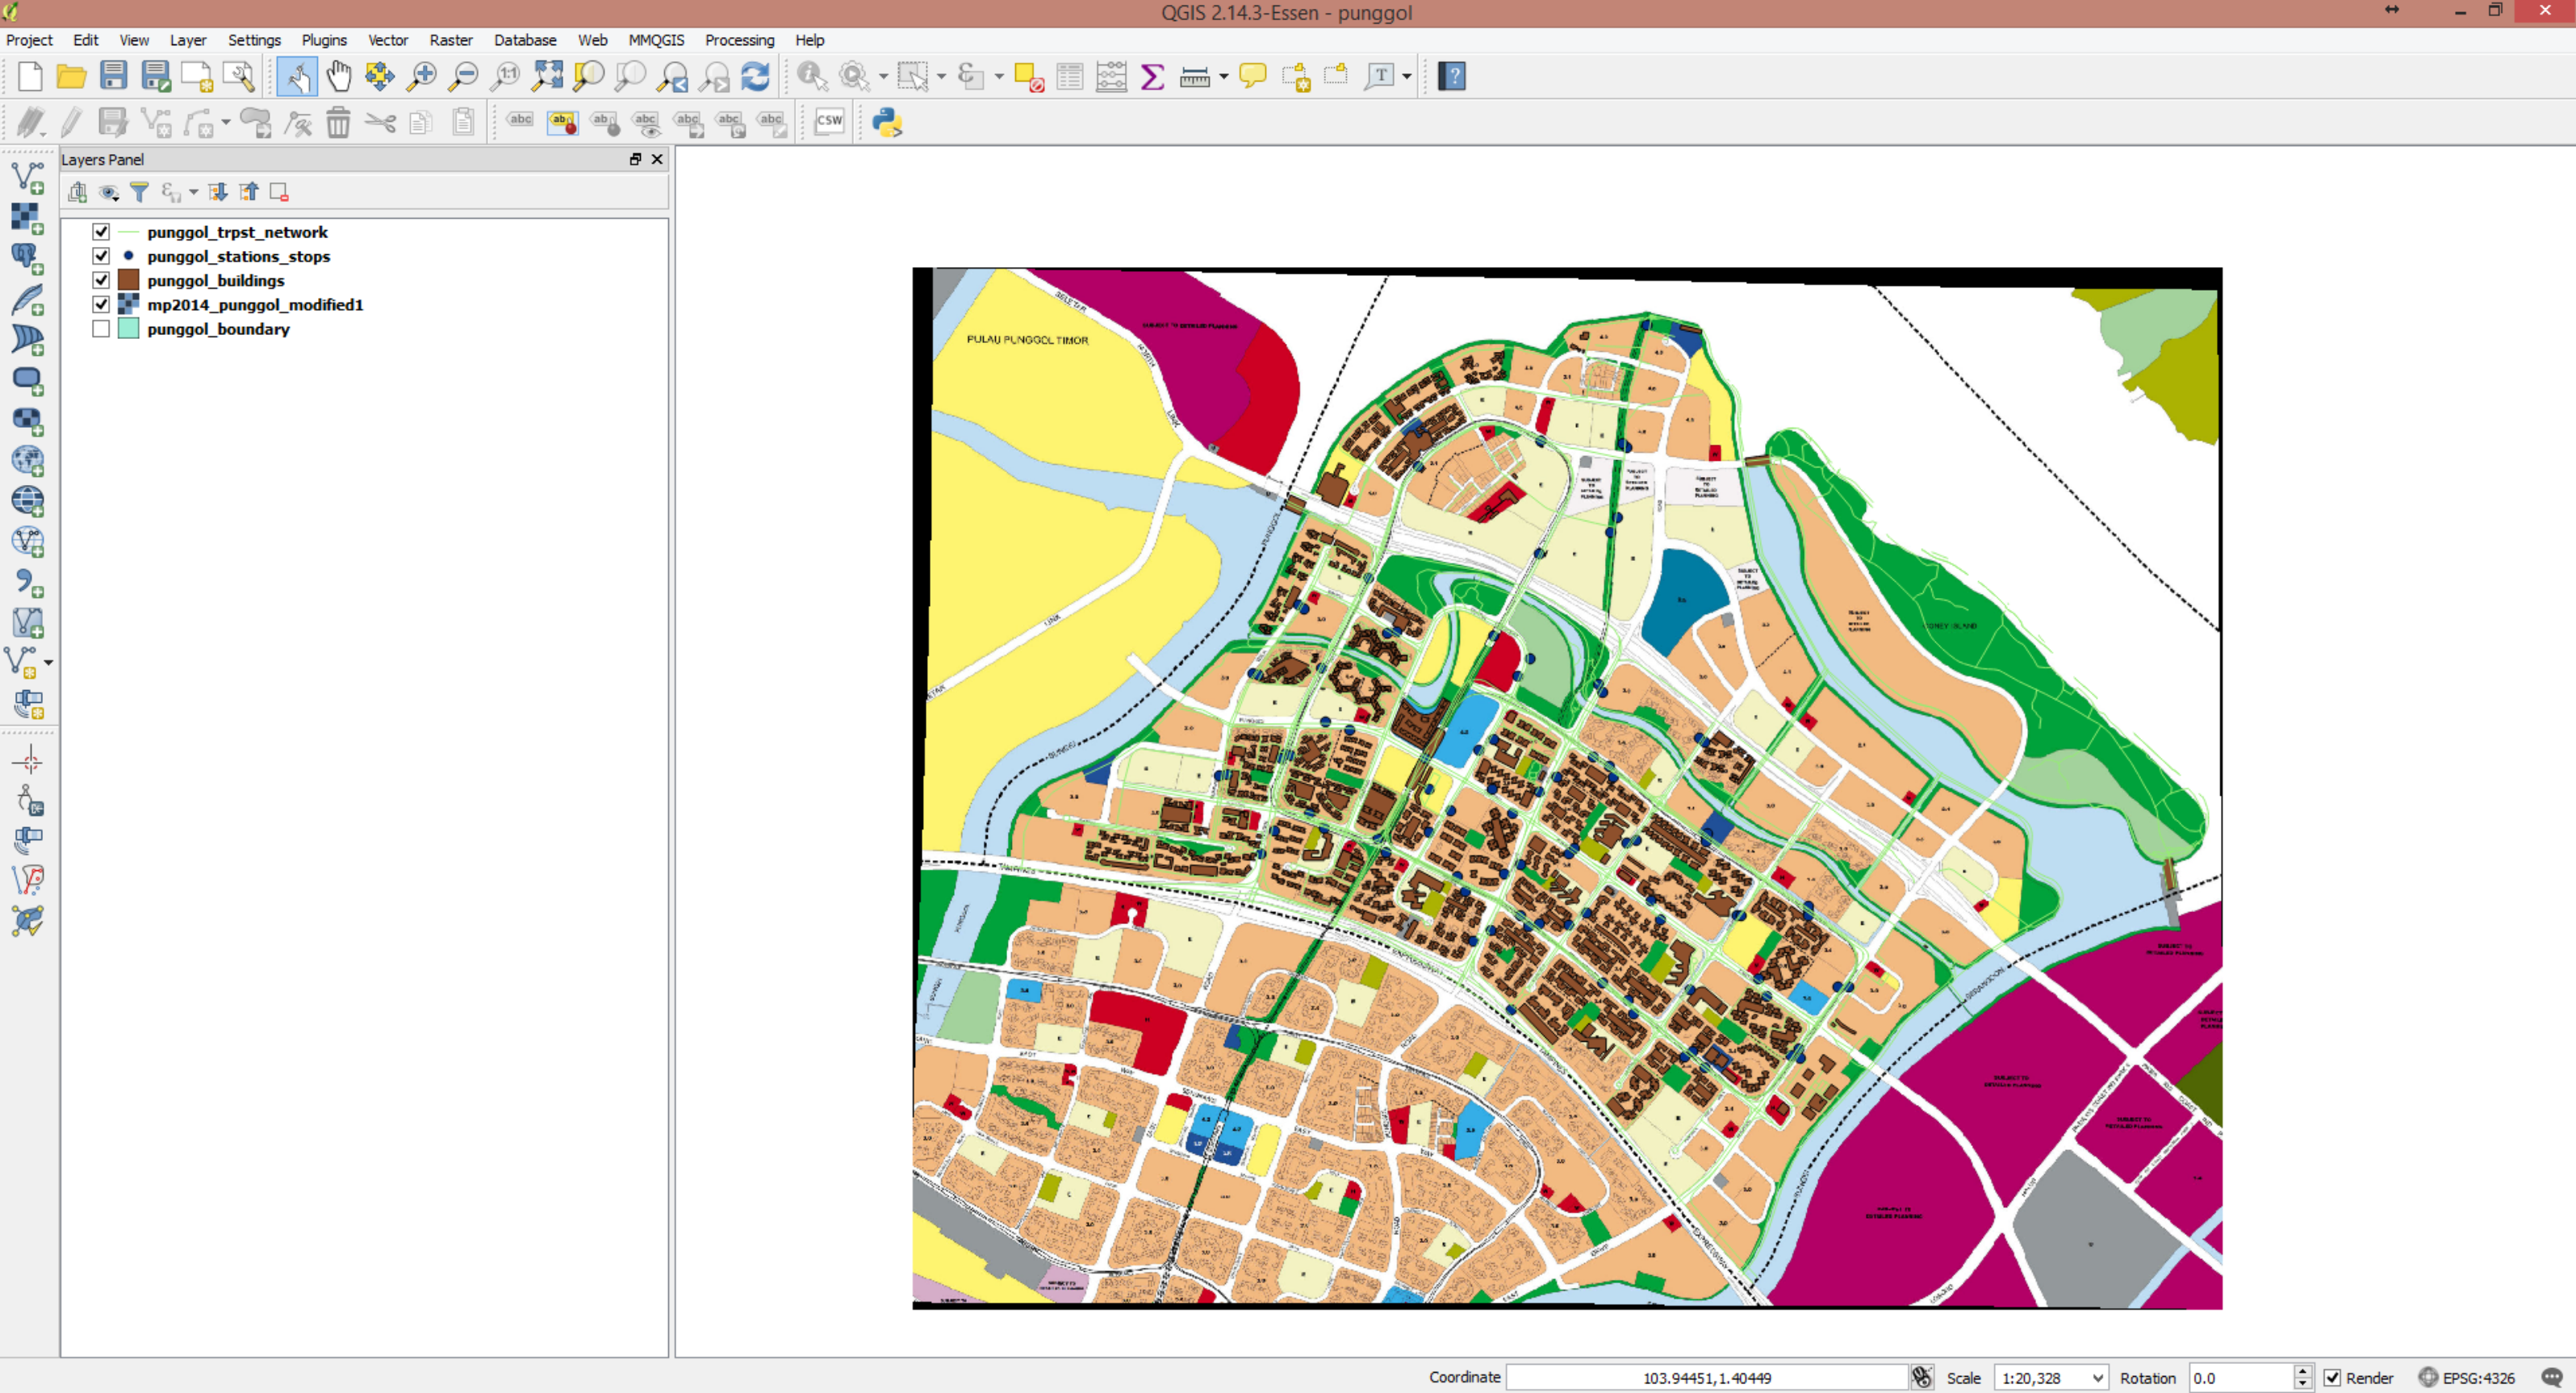
- 7.) Geo-referenced image with the OSM layers.
- 8.) Try multiple times for the image to totally match the OSM map. Add or remove corresponding points for each adjustment. Repeat 4i-4iii to add new points.
- i.) Click on 'Delete Points' to remove points
- ii.) Click on the point to remove.

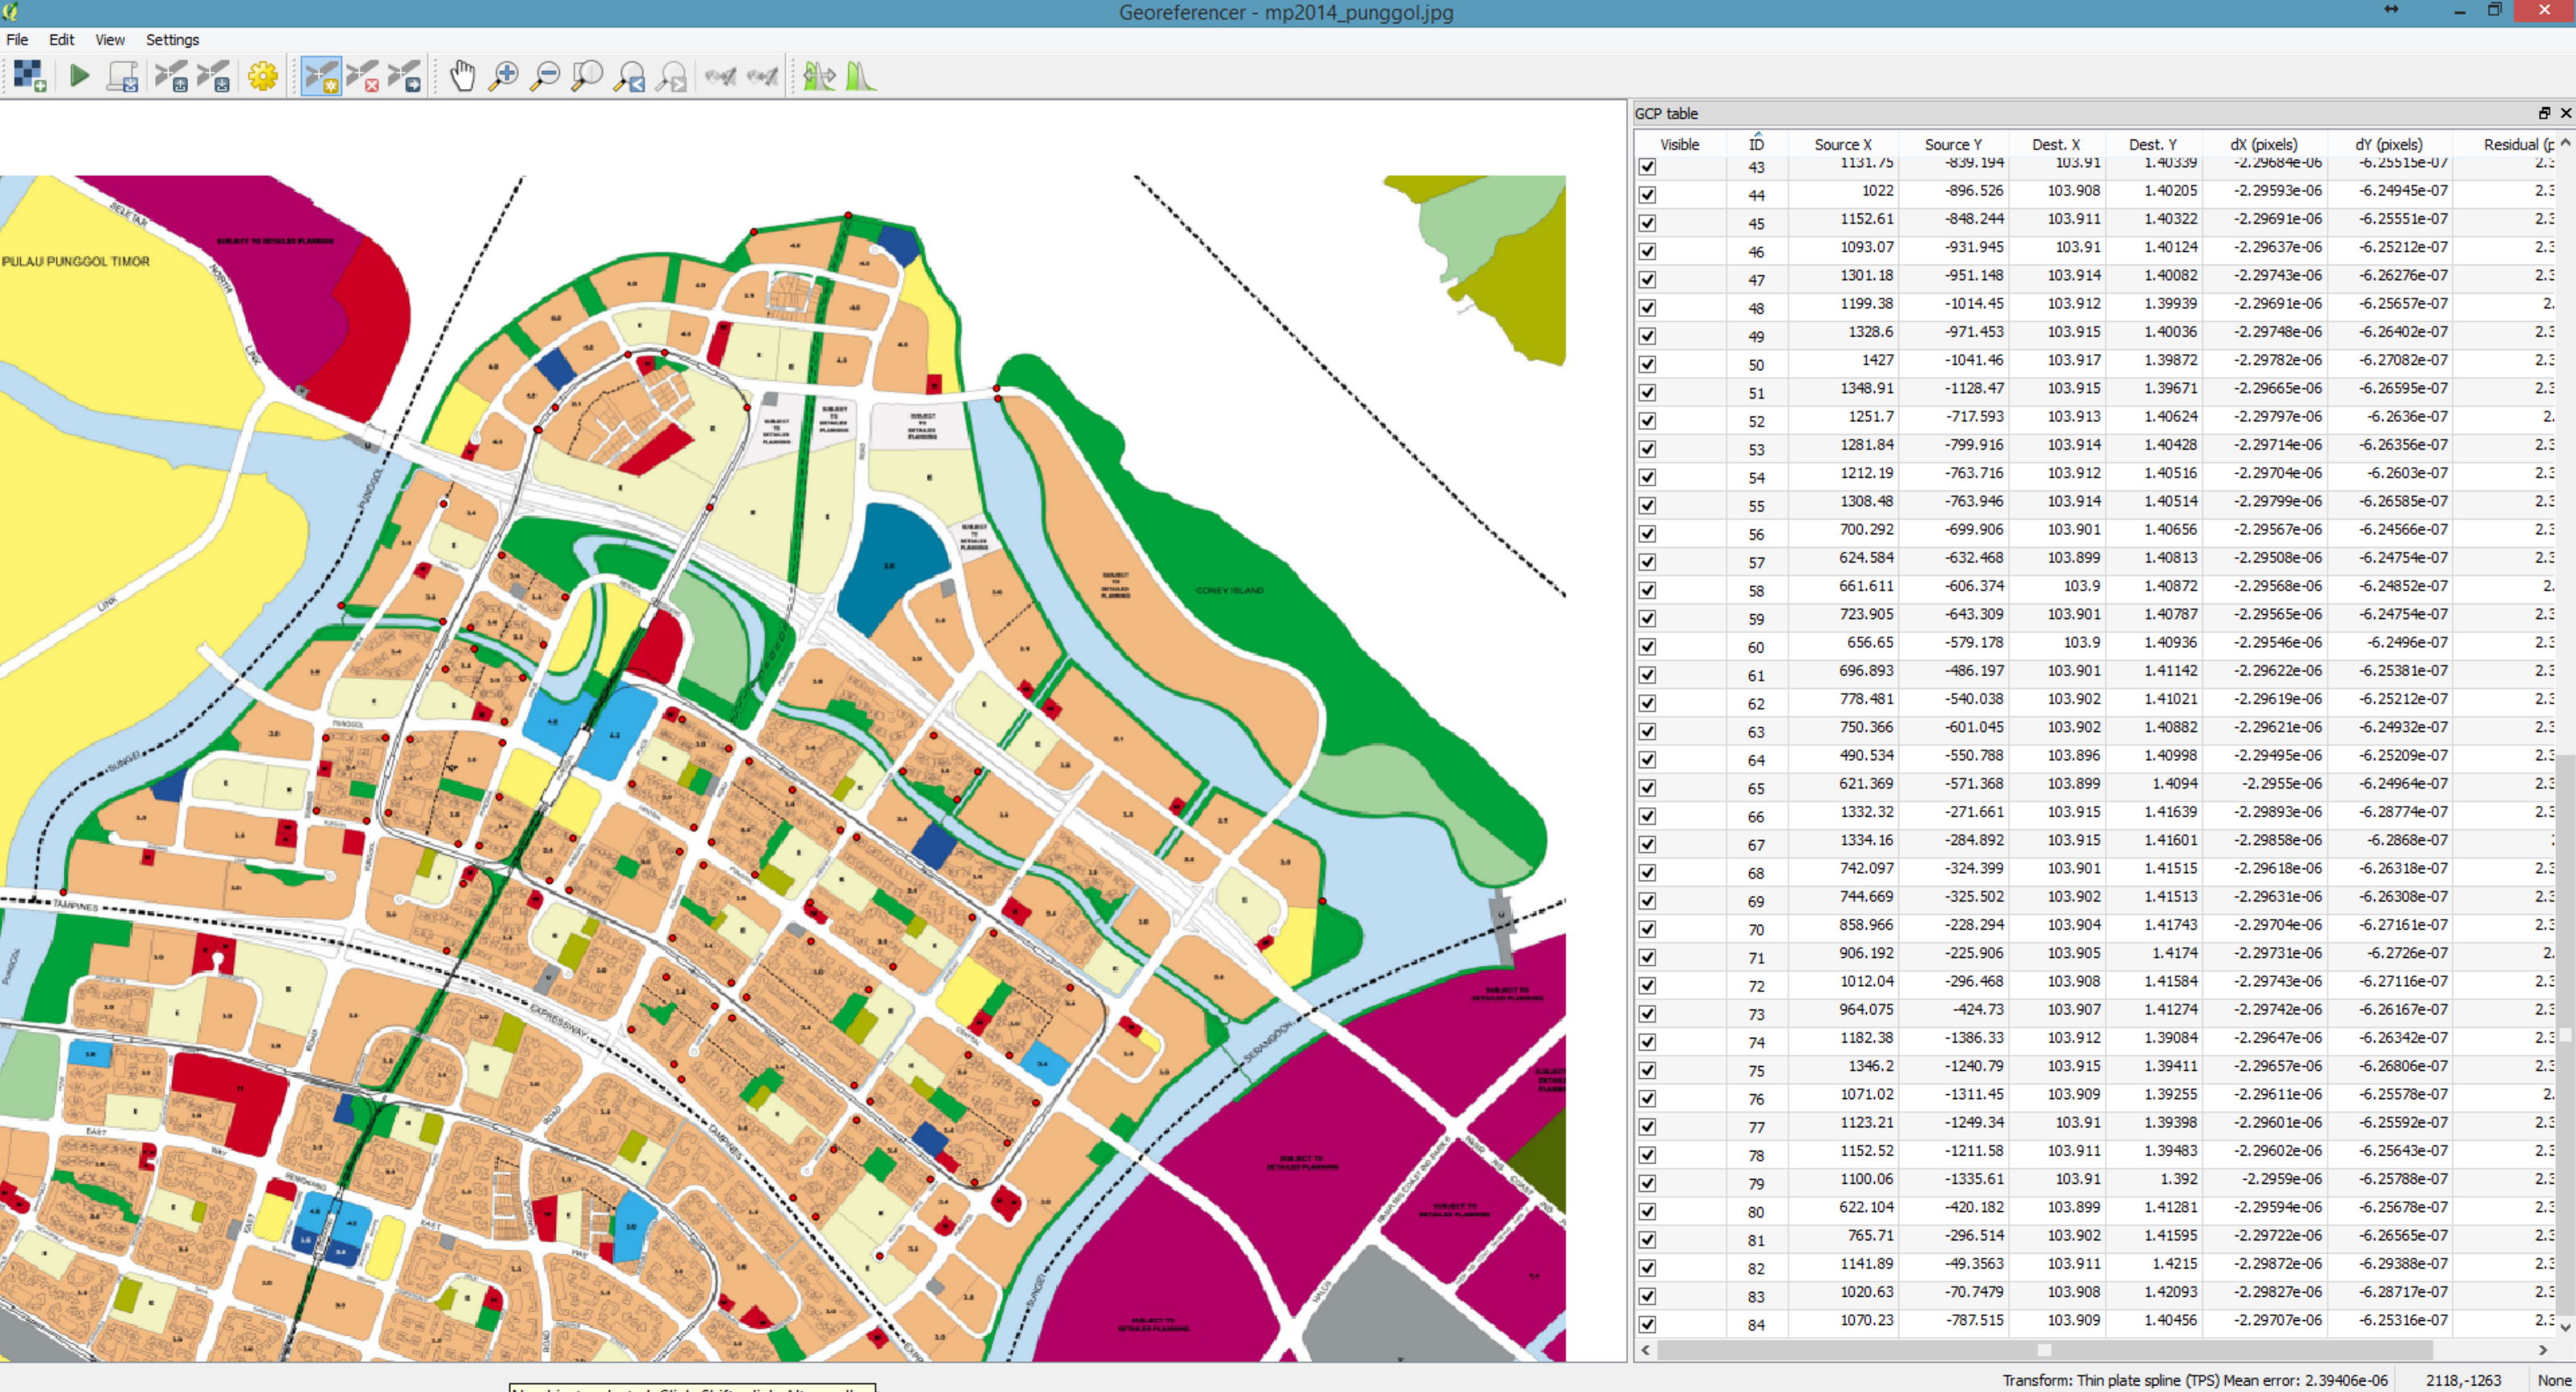
- 9.) For this case 84 points were specified to create a good match between the image and the OSM map.
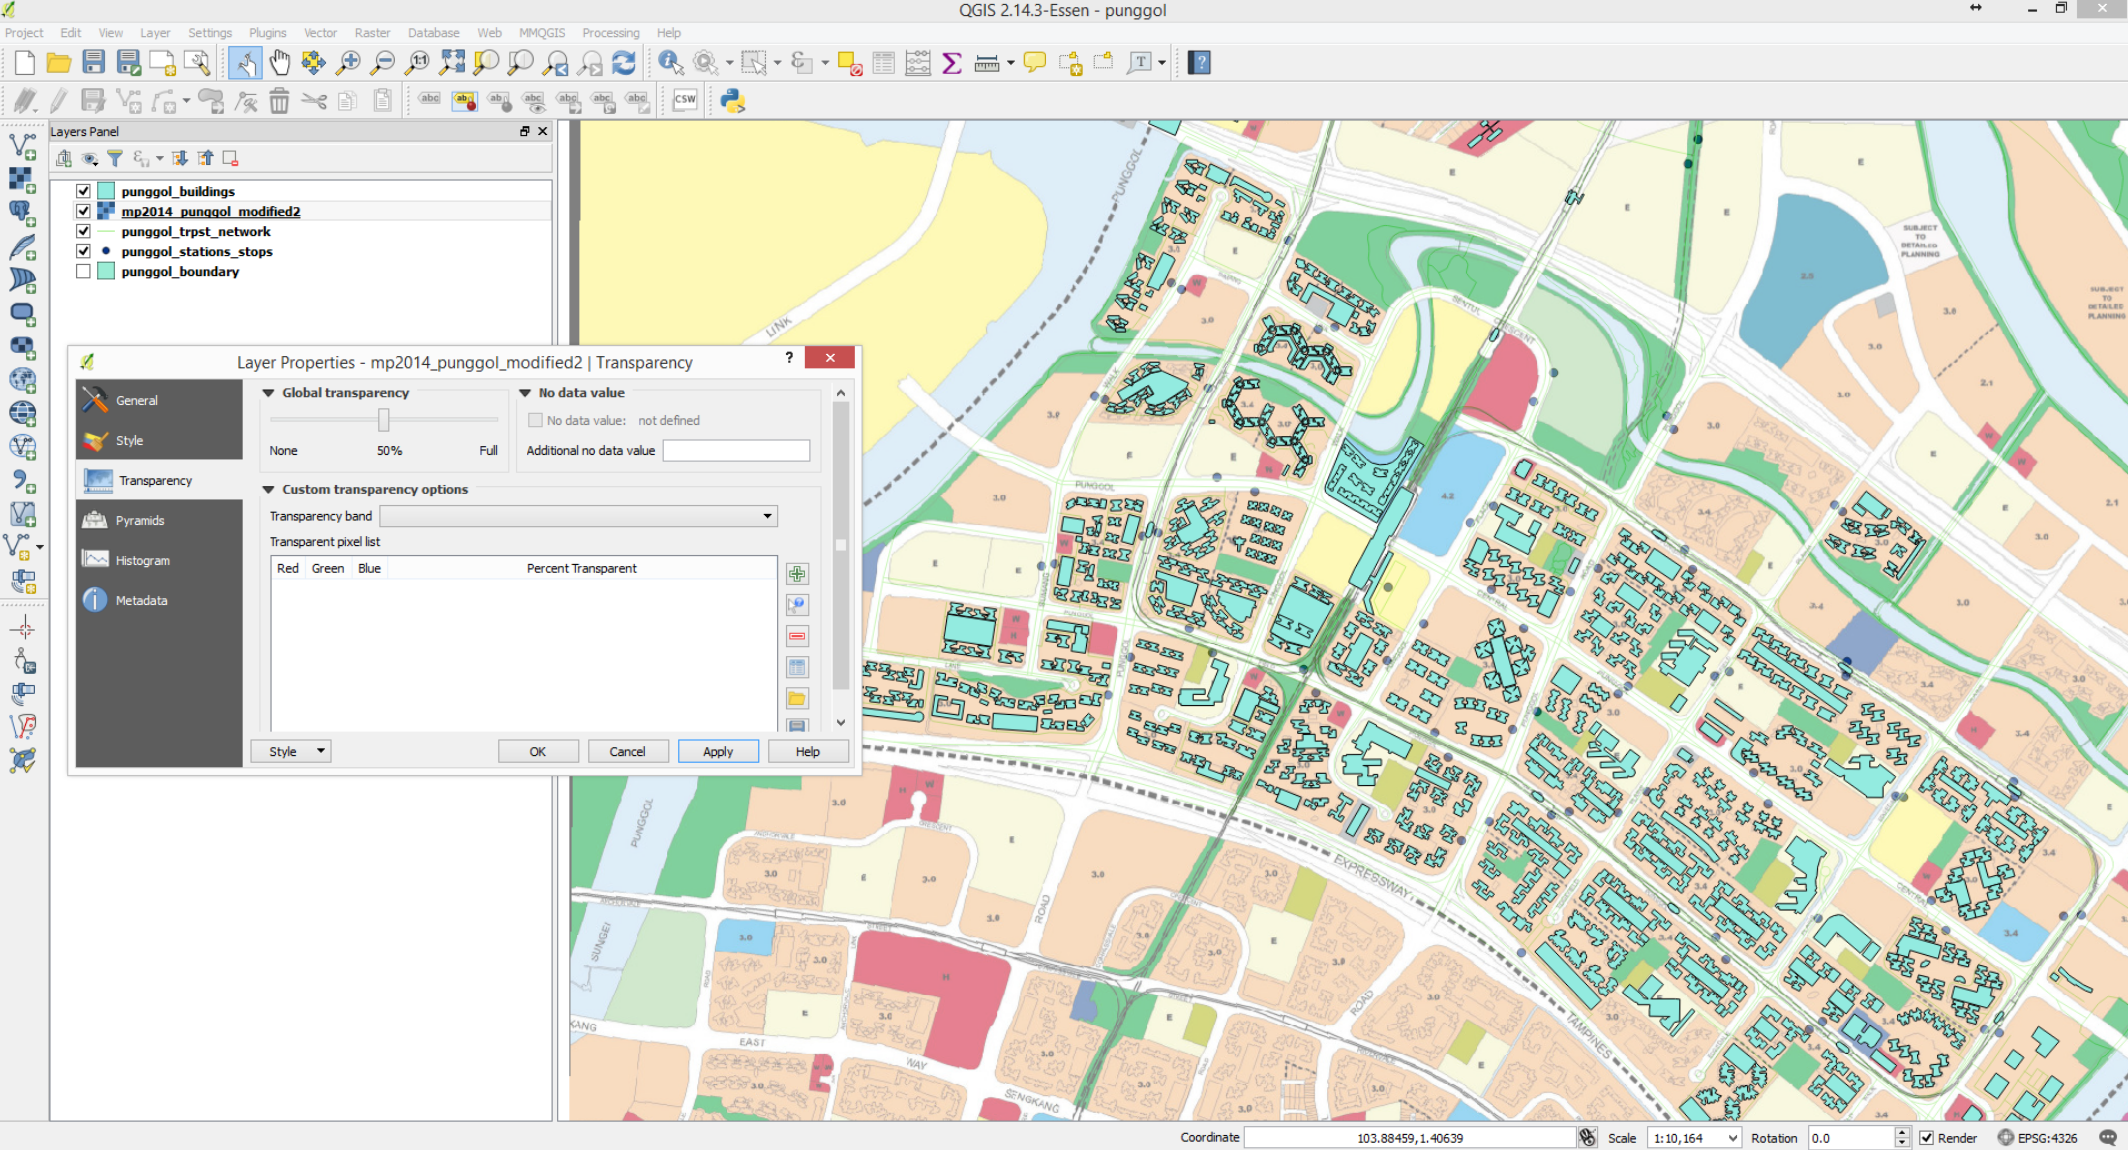
- 10.) Double click on the georeferenced image layer. In the dialog box go to Transparency -> Global Transparency and adjust the transparency settings